Insert Quick Screen Shots into Word
Here’s a personal productivity hidden gem within the Microsoft Word ribbon: If you find yourself adding a lot of images to a Word document, tabbing back and forth between apps to grab screen shots, there is an easier method for capturing the images you need. I originally shared this tip during the January 2018 Productivity Tips webinar, which you can find in my blog, on the CollabTalk YouTube page, or jump to the specific video tip by clicking here.
At the start of my career, I worked as a technical writer and business analyst (I was a PageMaker guy back in the day) and spent a lot of time building out documentation and massive reports, sometimes automated, but mostly hand-crafted in painstaking detail. So when I come across a tip that may have made the me-of-the-past more productive, I try to share these tools and tips with others. And this is likely one of those features which you’ve glanced at, but have never used — but hopefully you’ll give this one a try.
Creating Screen Shots
In the typical scenario, you might have two or three browser windows open, maybe a handful of tabs within each, while working on your Word document, and you’re Alt+tabbing between them to capture images for your document. My tool of choice is Snagit, but have also used the OneNote clipping tool and others. But you can do these same steps from within the Word experience. And here’s how:
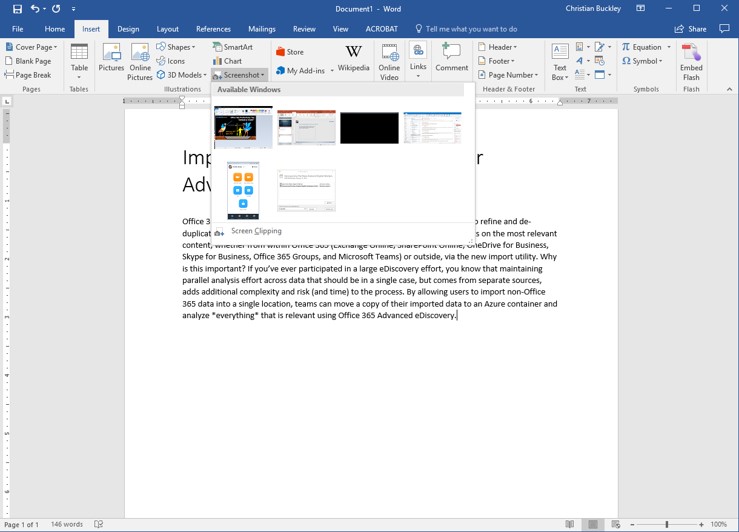
Within the body of your document, go up into the ribbon under Insert, and select Screenshot. A window will open, with all of your currently open tools and browser windows, as shown below.
If the image that you need is available in one of these screens, simply select the right screenshot to add, and with a click of your mouse, the image is added to your document.
Creating a New Screen Clip
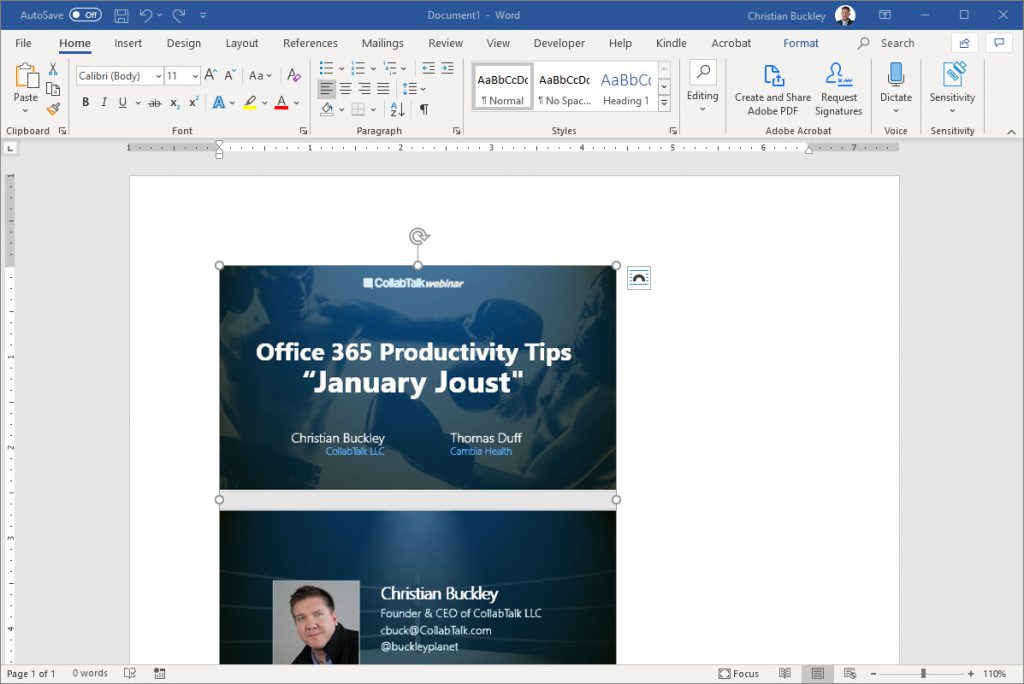
Of course, the image you need may be within the open screens on your desktop. Instead of inserting one of the default screen shots from your open windows, use the Screen Clipping tool under Insert > Screenshot to create a smaller image on-the-fly from one of your open windows. In this example, I’m interested in grabbing a clipping of the first two slides from my deck to use as a thumbnail. Using the Screen Clipping tool, I outline only the image I want.
Once the mouse button is released, the smaller clipping appears in your Word document.
Of course, from here you can edit the image, such as altering the size and color, adding effects, or cropping it to fit your needs. Honestly, I use the out-of-the-box image manipulation capabilities within Word and PowerPoint more than an image editing tool for most of my work, because they are quick and easy — and they allow me to accomplish what I need to do within my current workload rather than moving between tools. After you’ve cropped, colorized, and added effects to your image, you can also save your clipping as an image on your desktop or to the cloud, to be saved and used elsewhere (like your blog!)
I hope you find this productivity tip useful!


1 Response
[…] Insert Quick Screen Shots into Word [buckleyPLANET] […]